

Create A Blog In WordPress – Easiest Guide To Design Your Own Blog

You might have heard from other bloggers that to make it blogging you need to create a blog in WordPress.
While this is important, it isn’t the only way to blog, there are so many alternatives to WordPress out there….
But the reason why wordpress.org is most preferred for blogging is because it is a content management system.
Specially designed for content creation.
WordPress offers more versatility and control than the regular free blogger or WordPress.com account.
And thats why we will be focusing on creating a blog with WordPress.org
This process is quick and easy to follow.
Quick Navigation
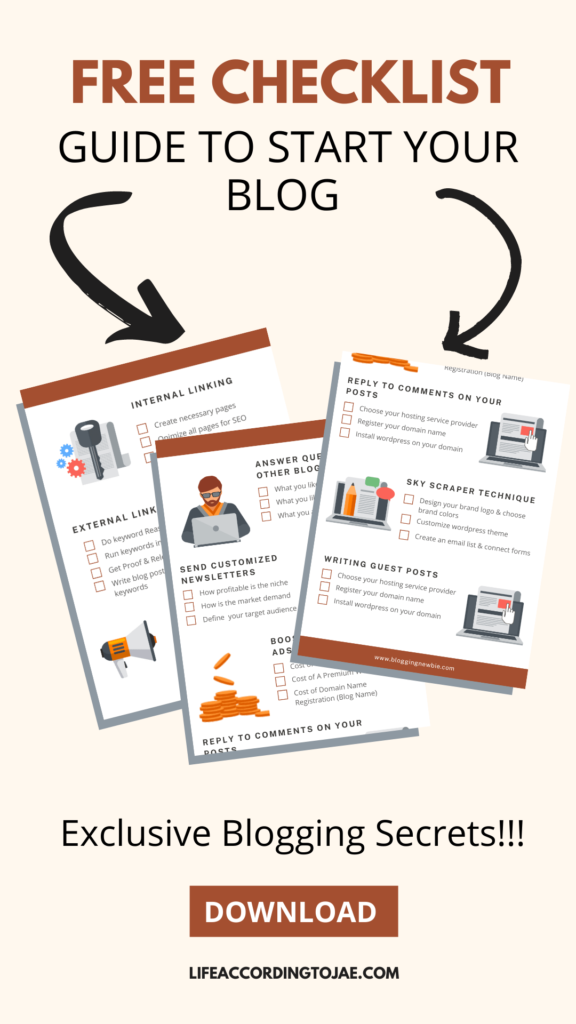
Start A Blog Checklist!
Save time and get a summary checklist of this entire post delivered straight to your mailbox!
Why Should You Listen To Me?
I have been designing websites for almost 5 years now and believe me when I say, it wasn’t easy at first.
There were a lot of web development terms that I needed to get used to,
so many things to research and so many mistakes I made…
But thankfully you won’t have to go through all that because i have got your back.
So if you are ready let’s get right to it……
Create A Blog In WordPress Step 1
Decide On A Domain Name For Your Blog And Register It
The first step to create a blog in WordPress is to carefully decide what you want the name of your blog to be (domain name e.g. “www.thenameofmyblog.com”) of your blog.
Notice I said “carefully decide”,
You don’t want to create a blog whose name is totally unrelated to your niche (a mistake I was once guilty of),
So to help you decide a blog name, let’s quickly look at what a “niche” is.
Choosing a blog niche simply means choosing the specific topic to blog about
This is very important because the niche you choose can influence the type of audience you are targeting,
It determines the promotional methods to use in bringing traffic to your website and even the monetization of your website itself.
For example, if you are interested in fashion blogging,
Then a domain name like “redheelsandboots.com” might be well suited for you than a domain name like “evergreen.com” which hardly suggests anything related to fashion.
Get Domain Name Suggestions
If you are having trouble choosing a domain name,
Here are some websites that can help you with a domain name ideas,
All you have to do is enter a word that you want to be in your domain name and search and you will see thousands of domain name suggestions.
- https://www.namemesh.com/
- https://instantdomainsearch.com/domain/generator/
- https://www.shopify.com/tools/domain-name-generator
- https://www.nameboy.com/
Want to get a free domain?
Checking For Domain Name
After this, the next thing you want to do is to check for the availability of the domain name that you have chosen.
To do this I would recommend checking and registering your domain name at Hostgator.com, the hosting company that I use and swear by.
Hostgator is the web hosting company that I use,
They have really good and fast customer service and I don’t see myself changing to any other hosting service soon just because they are really great to work with.
I will also be providing you with a special discount code for your domain name registration in case you decide to register for your hosting with them, just click on the image below to get it asap!
Please note that if you make a purchase through my links.
I will earn a small commission at no extra cost to you (see my disclosure for more information).
Check If Domain Is Available
To check if your domain name is available, simply go to https://www.hostgator.com/domainnames and type in the domain name you have chosen into the box and click search.
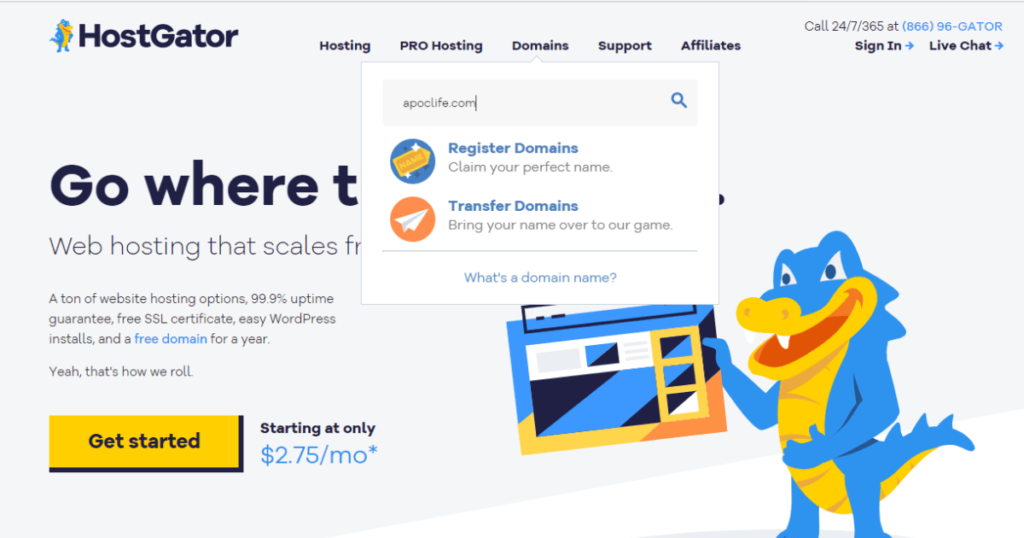
Here, you can also choose what you want your domain names to end with example you can choose if it ends with a “.com”, or “.net,”
.com domain names are used for websites created for commercial purposes such as businesses, blogs, personal websites, and affiliate websites etc.,
The .net domain is used to register websites that deal with internet services like email marketing etc.
To register your domain name simply enter the domain name you want and click on search,
You should see the following page, telling you that your domain name is available.
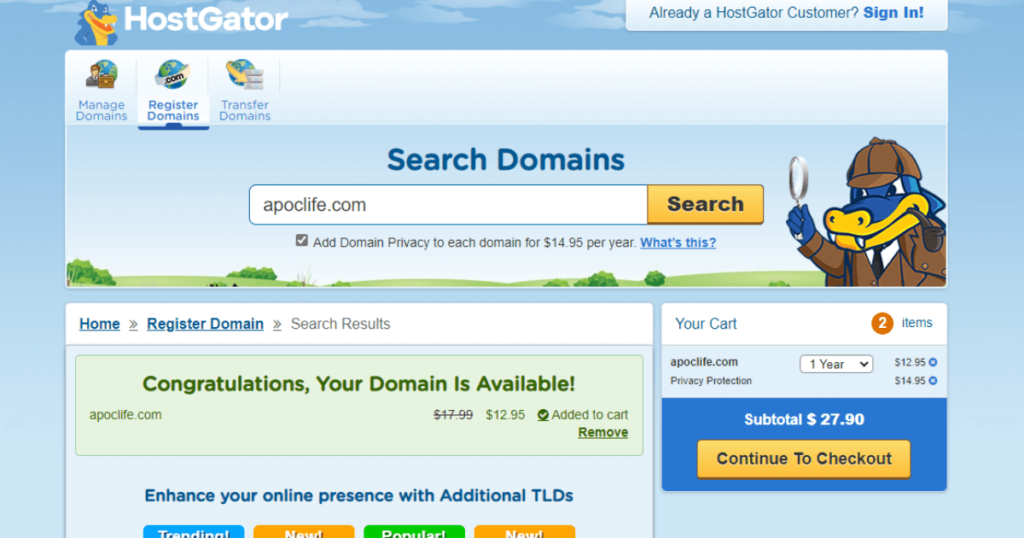
Right under the domain search bar,
You will notice a “add domain privacy to each domain for $14.95 dollars per year” checkbox,
Domain privacy simply means that when your website is registered,
The general public won’t be able to see personal details such as the name or email address of the person who registered the website on “WHOIS” directory where this information should normally be available.
If you are interested in adding this privacy feature, simply check the box or uncheck it to avoid paying for the privacy feature.
Create A Blog In WordPress Step 2
Pay For the Blog Domain Name & Hosting
In simpler terms,
Website hosting is the simple act of putting your website on the internet so that it becomes accessible to your audience through your registered domain name.
Hostgator offers different hosting plans as you can see here,
All with their own different resources available, but since you are registering just one blog, you can go for the hatchling plan.
If you decide to go for a one-year hosting plan, Hostgator will give you one-year free domain name registration with your hosting plan
You will have to pay for the domain separately if you decide to go for a hosting plan below the 1-year duration.
To register, simply click on the buy now button of the plan you have chosen to go to the payment section.
In the payment section,
You need to enter the free domain name of your choice if you are going for the 1 year hosting plan,
After confirming the domain name availability and choosing the domain extension type.
Fill in the required details such as username etc. and don’t forget to choose a 4 digit security pin,
You will be asked to provide this pin to confirm that you are the one whenever you call the Hostgator customer care for assistance.
Fill In Your Billing Information
Next, you need to fill in your billing info,
Note that you would need to have a credit or debit card to be able to make this purchase online.
Next up are the available additional services that you might require.
Just so that you are aware since you are starting out, you don’t necessarily need all of these additional services.
Here’s a quick tip – most of them can also be accomplished using WordPress plugins!.
At the next step, you can enter the coupon code that I will be providing for you to get an extra amount off the total amount for hosting your blog.
After registering the domain and hosting, you will get a confirmation email saying that you have registered your web hosting and domain name
Please note that after registration your website name will be unavailable for 2 to 3 days,
This is because Hostgator will need that time to propagate the domain name that you have just purchased to all the web servers in the world so that it can be accessed from anywhere at any time.
Create A Blog In WordPress Step 3
Install WordPress on Your Blog Domain Name
After receiving a confirmation email from Hostgator telling you that your domain name is now accessible
The next step is to install WordPress on your domain name.
To do that you will need to log into your Hostgator customer portal account using the log in details provided in the email that you received and click on the “Launch cPanel” icon on your account dashboard.
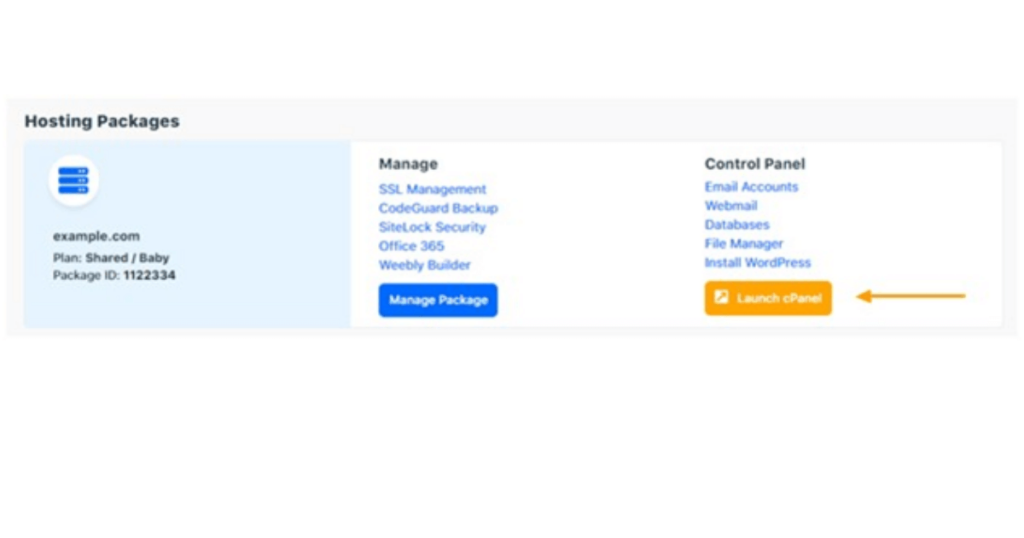
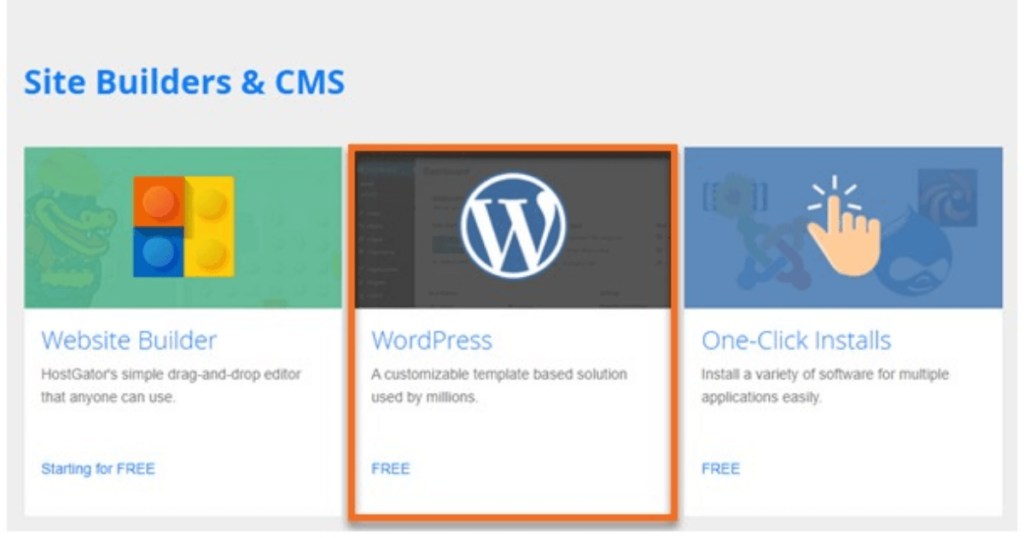
Next, you need to navigate to the CMS and Site Builders Section and click on the WordPress icon to install.
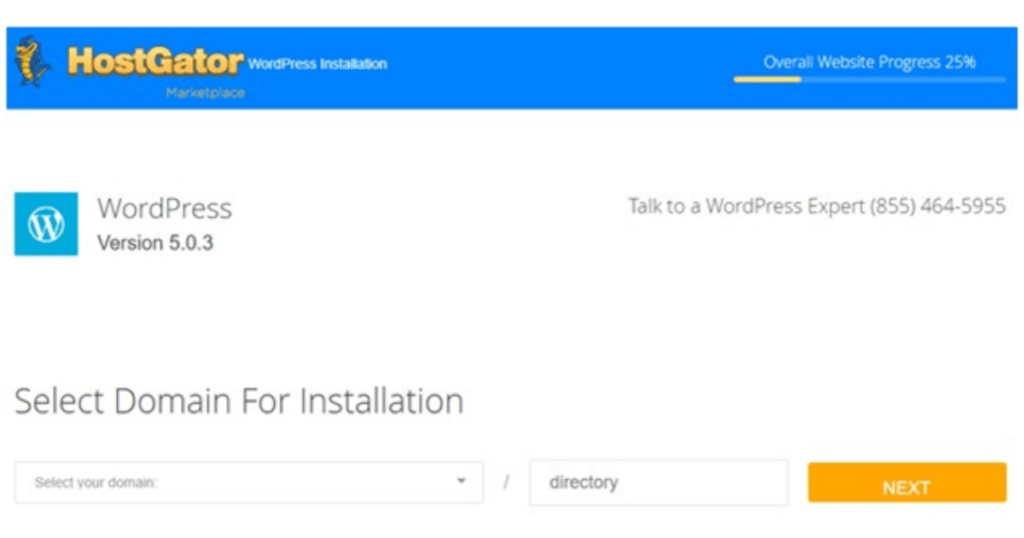
Next thing you need to do is to select the domain name you want to install WordPress on,
Select the domain name that you have just registered, and leave the directory box empty.
Fill The Domain Installation Form
Next, a form will appear asking you to fill in the following details:
- Blog Title:-Here just type in the domain name of your website
- Administrator Username: – Here you choose the username for the main owner of the website,
choose carefully, you will need this username to login to the website’s WordPress dash board later on.
- First Name:- Enter your first name
- Last Name:- Enter your last name
- Administrator Email: – Here you choose the email for the main owner of the website,
choose carefully, you will need this email to login to the website’s WordPress dash board later on.
- Check the “terms and conditions” box
- Click On Install
Once your WordPress installation is complete,
You will see an installation complete progress bar at the top of the screen and below that,
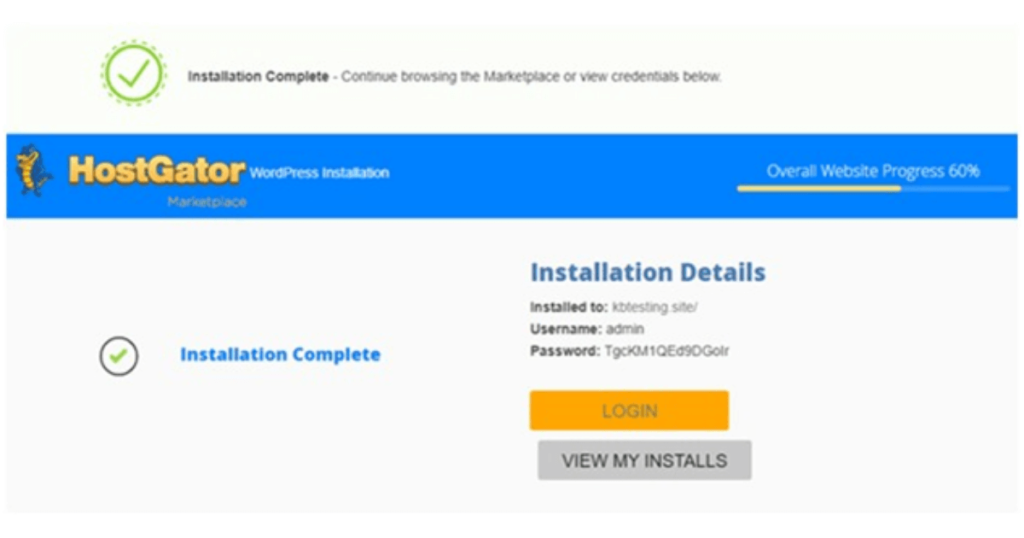
The log in details required to log into your website’s WordPress dashboard.
Copy this login details and save them to a word document file so that you can copy and paste them into WordPress login page later on.
Congratulations! WordPress has successfully been installed on your domain name!
Create A Blog In WordPress Step 4
Log in to WordPress Dashboard and Install Your Blog Theme
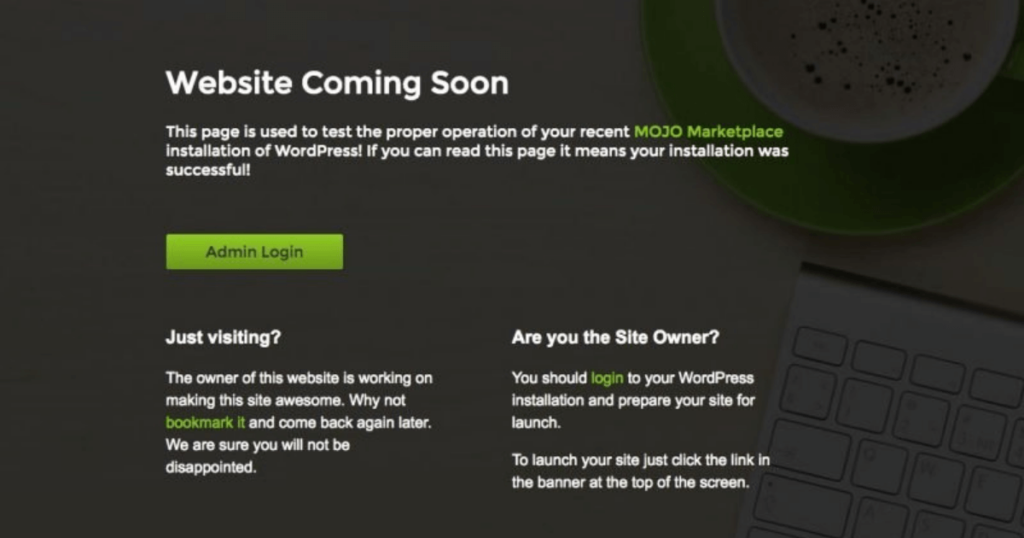
If you have followed all the steps above successfully,
Then your website should now display the coming soon page
When you type in your domain name into any search engine, the page displayed should look like this.
To log into your WordPress dashboard, simply click on the green button that says “Admin Login” on your coming soon page.
You should see this page next…
Now, enter the email address or username you chose in step 2 and the password you copied to the word document and paste both in, to log into WordPress.
This is what the WordPress dashboard should look like,

WordPress Dashboard Guide
So am going to walk you through the different tools in the WordPress dashboard and how to use them.
- Posts :- This is where you create blog posts for your WordPress blog,
In this section you can see all the posts that you have created in your blog,
You can also add a new post by clicking the add new button.
- Media: – This section of WordPress shows all the images and videos displayed on your WordPress page
You can add new images and videos here.
- Pages: – This section of WordPress simply shows you the pages that you have on your WordPress website
In this section you can edit, add new or delete pages.
- Comments: – This section shows the comments of your users on your WordPress website.
- Projects: – This is a section for setting up tasks that need to be completed on your WordPress website.
- Appearance: – In this section, you will find the themes, widgets, navigation, and footer menus and theme editor,
You can install, uninstall, and even customize your theme in this section.
- Plugins: – Here you will find all the plugins working in your WordPress website,
You can also add a new plugin or uninstall a plugin here.
- Users: – This section shows you all the people who have access to your WordPress website,
Their access may differ depending on the type of roles assigned to them.
- Tools: – In the tools section of WordPress, you can import,
Export or erase personal data, you can also view your website health statistics.
- Settings: – In the settings section of WordPress you can access your page settings,
You can set which page you want to be displayed as the home page of your website,
You can access the permalinks and SSL (Security Certificate) of your website here and most of the settings of plugins that you install can be accessed from here.
Install your WordPress Theme
In simple terms, a WordPress theme is simply a template of the layout of your WordPress website,
It is a template of the exact style your WordPress website will take.
To install your WordPress theme, simply navigate to the Appearance section in your WordPress dashboard and click on themes.
You can go through all the free themes available for WordPress to see if any of them match your preferences or if you want you can search for premium themes online for your WordPress blog and download it,
Then upload it to WordPress by clicking upload theme
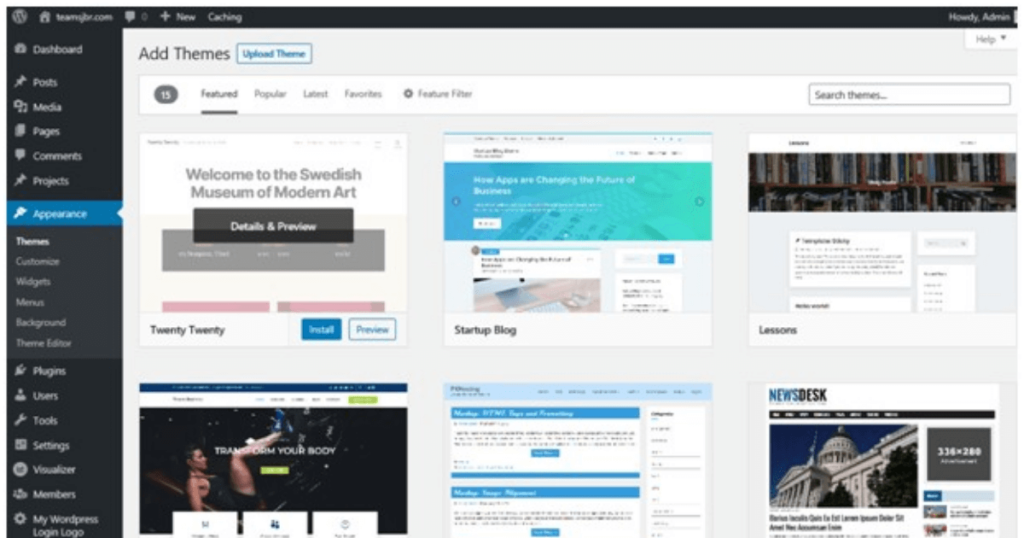
Next, click the “add new” button at the top to install a new theme
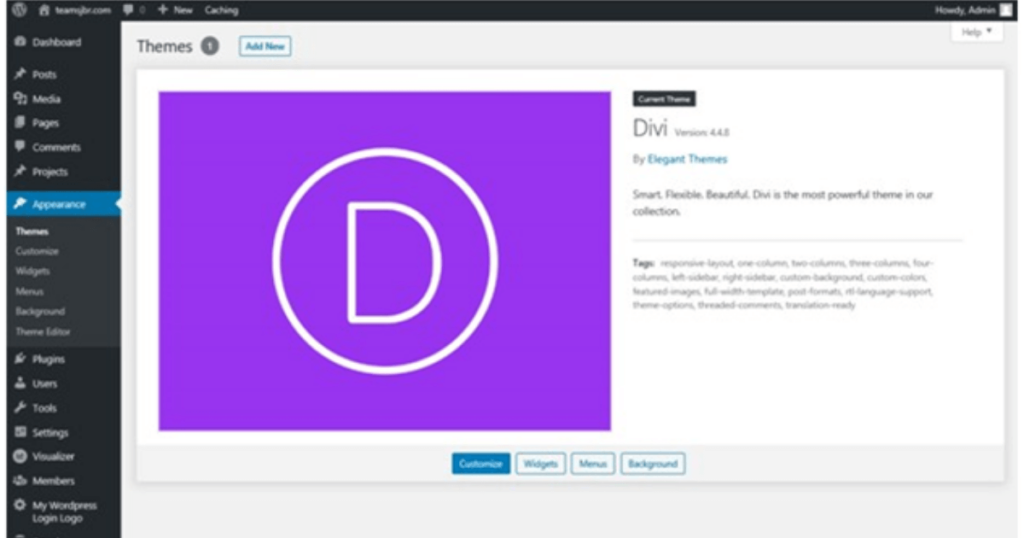
After installing your WordPress theme,
You will see an option to activate it,
Simply click on that and your website will automatically take the look and feel of your theme.
After installing your WordPress theme,
I will advise that you uninstall all the plugins on your website so that you have a fresh clean slate that you can begin developing your website on.
Create A Blog In WordPress Step 5
Customize Your WordPress Blog
To customize the look of your WordPress website,
Simply go to the Appearance section > customize tab to customize or change the details your WordPress website theme or information as you see fit.
Your WordPress theme customization panel should look like the picture below

The options may differ depending on the particular theme you have installed.
Here you can make changes you wish and click the publish button at the top to save those changes till you are comfortable with the look and feel of your blog.
In Conclusion
If you have followed me to the end of this tutorial,
Congratulations! You have successfully created your WordPress blog without the help of a web designer or developer!
I hope you understood the tutorial, if you have more questions,
You can leave a comment below and I will reply with an answer in no time.